


By Beth Dance
What happened to user guides?
It wasn’t that long ago when you would buy a brand-new phone, and inside the taut packaging was a crisp and clean instruction guide. It would break down everything you ever needed to know about the device. From how to turn the phone itself on to helpful recommendations on how to maintain the phone to extend its life.
Today, when you purchase an iPhone, or related gadget, you’re lucky if you get a paper receipt on your way out of the store. Without the support of the now defunct paper manual, you’re left to your own devices—just expected to simply dig in and figure it out alone.
For those of you relying on help, there is a win. There is a more environmentally friendly alternative to the paper manual, and that’s downloading the user guide online through Apple books. What?!
Sigh.
Thank goodness for the people in this world who know more about technology than I do!
I recently learned from a colleague that many iPhone models have a built in (hidden) scanner. Hearing about this little gem came at the most perfect time since my all-in-one printer was destroyed by the two little loves of my life. Coincidently, I’ve recently had to scan documents a lot. Healthcare records, identification, and other miscellaneous items have been scanned within minutes from my iPhone.
And, what people don’t always realize is that taking photos and sending these items as photos takes up a lot of storage on your phone. Not anymore!
So, in the spirit of paying it forward, I am going to share with you this sage advice that my colleague shared with me. This is how to use your scanner step-by-step.
Step 1- Open up your notes app.
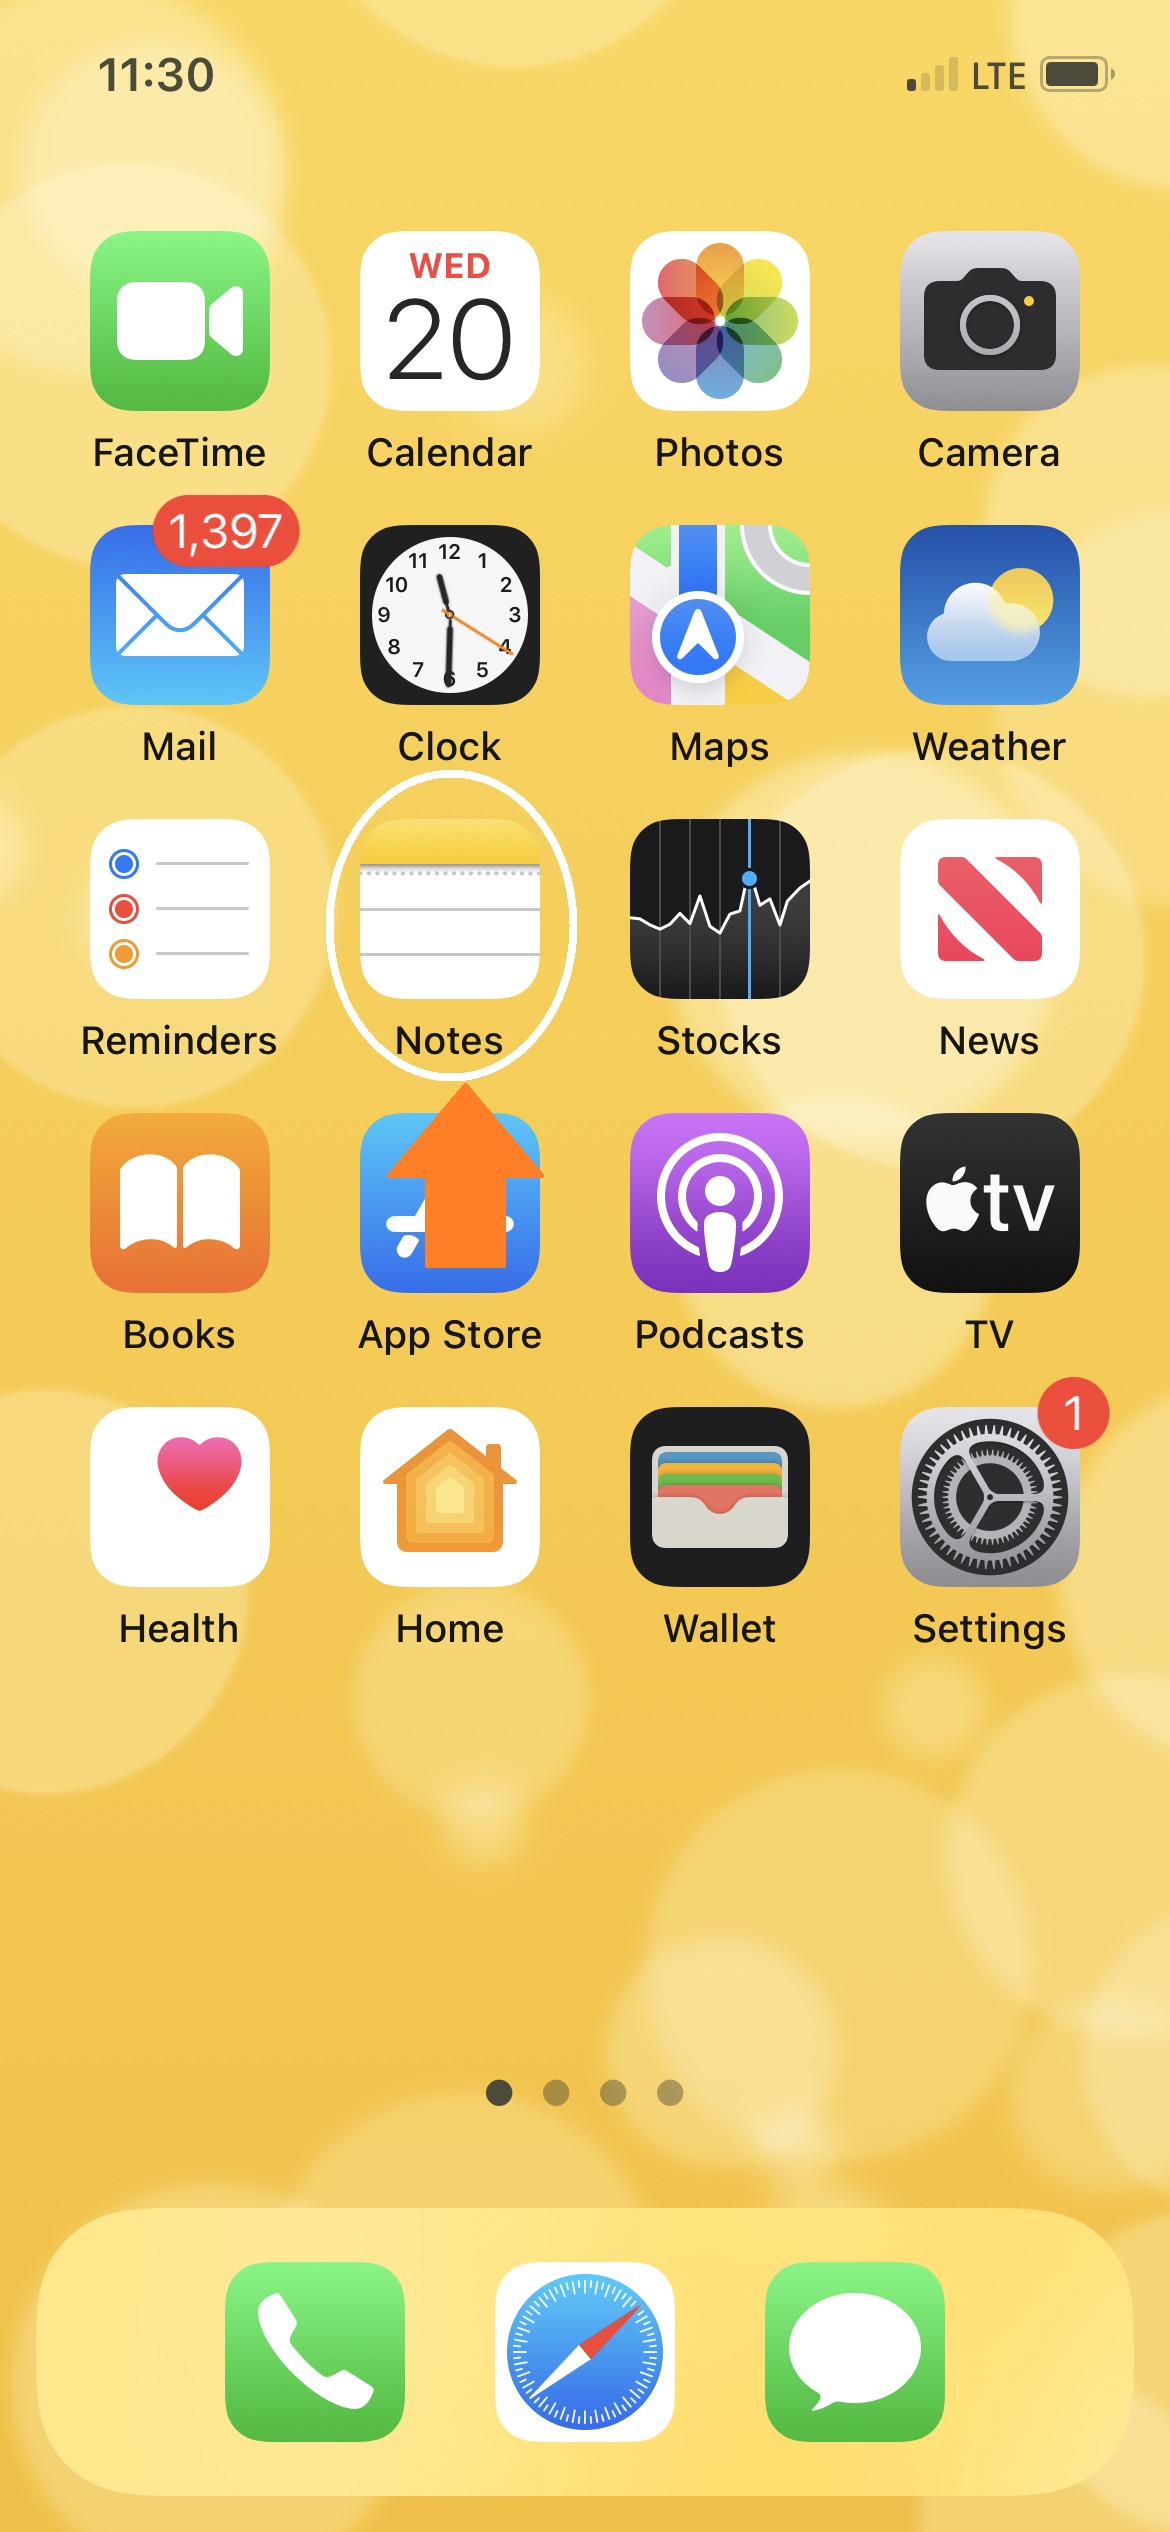
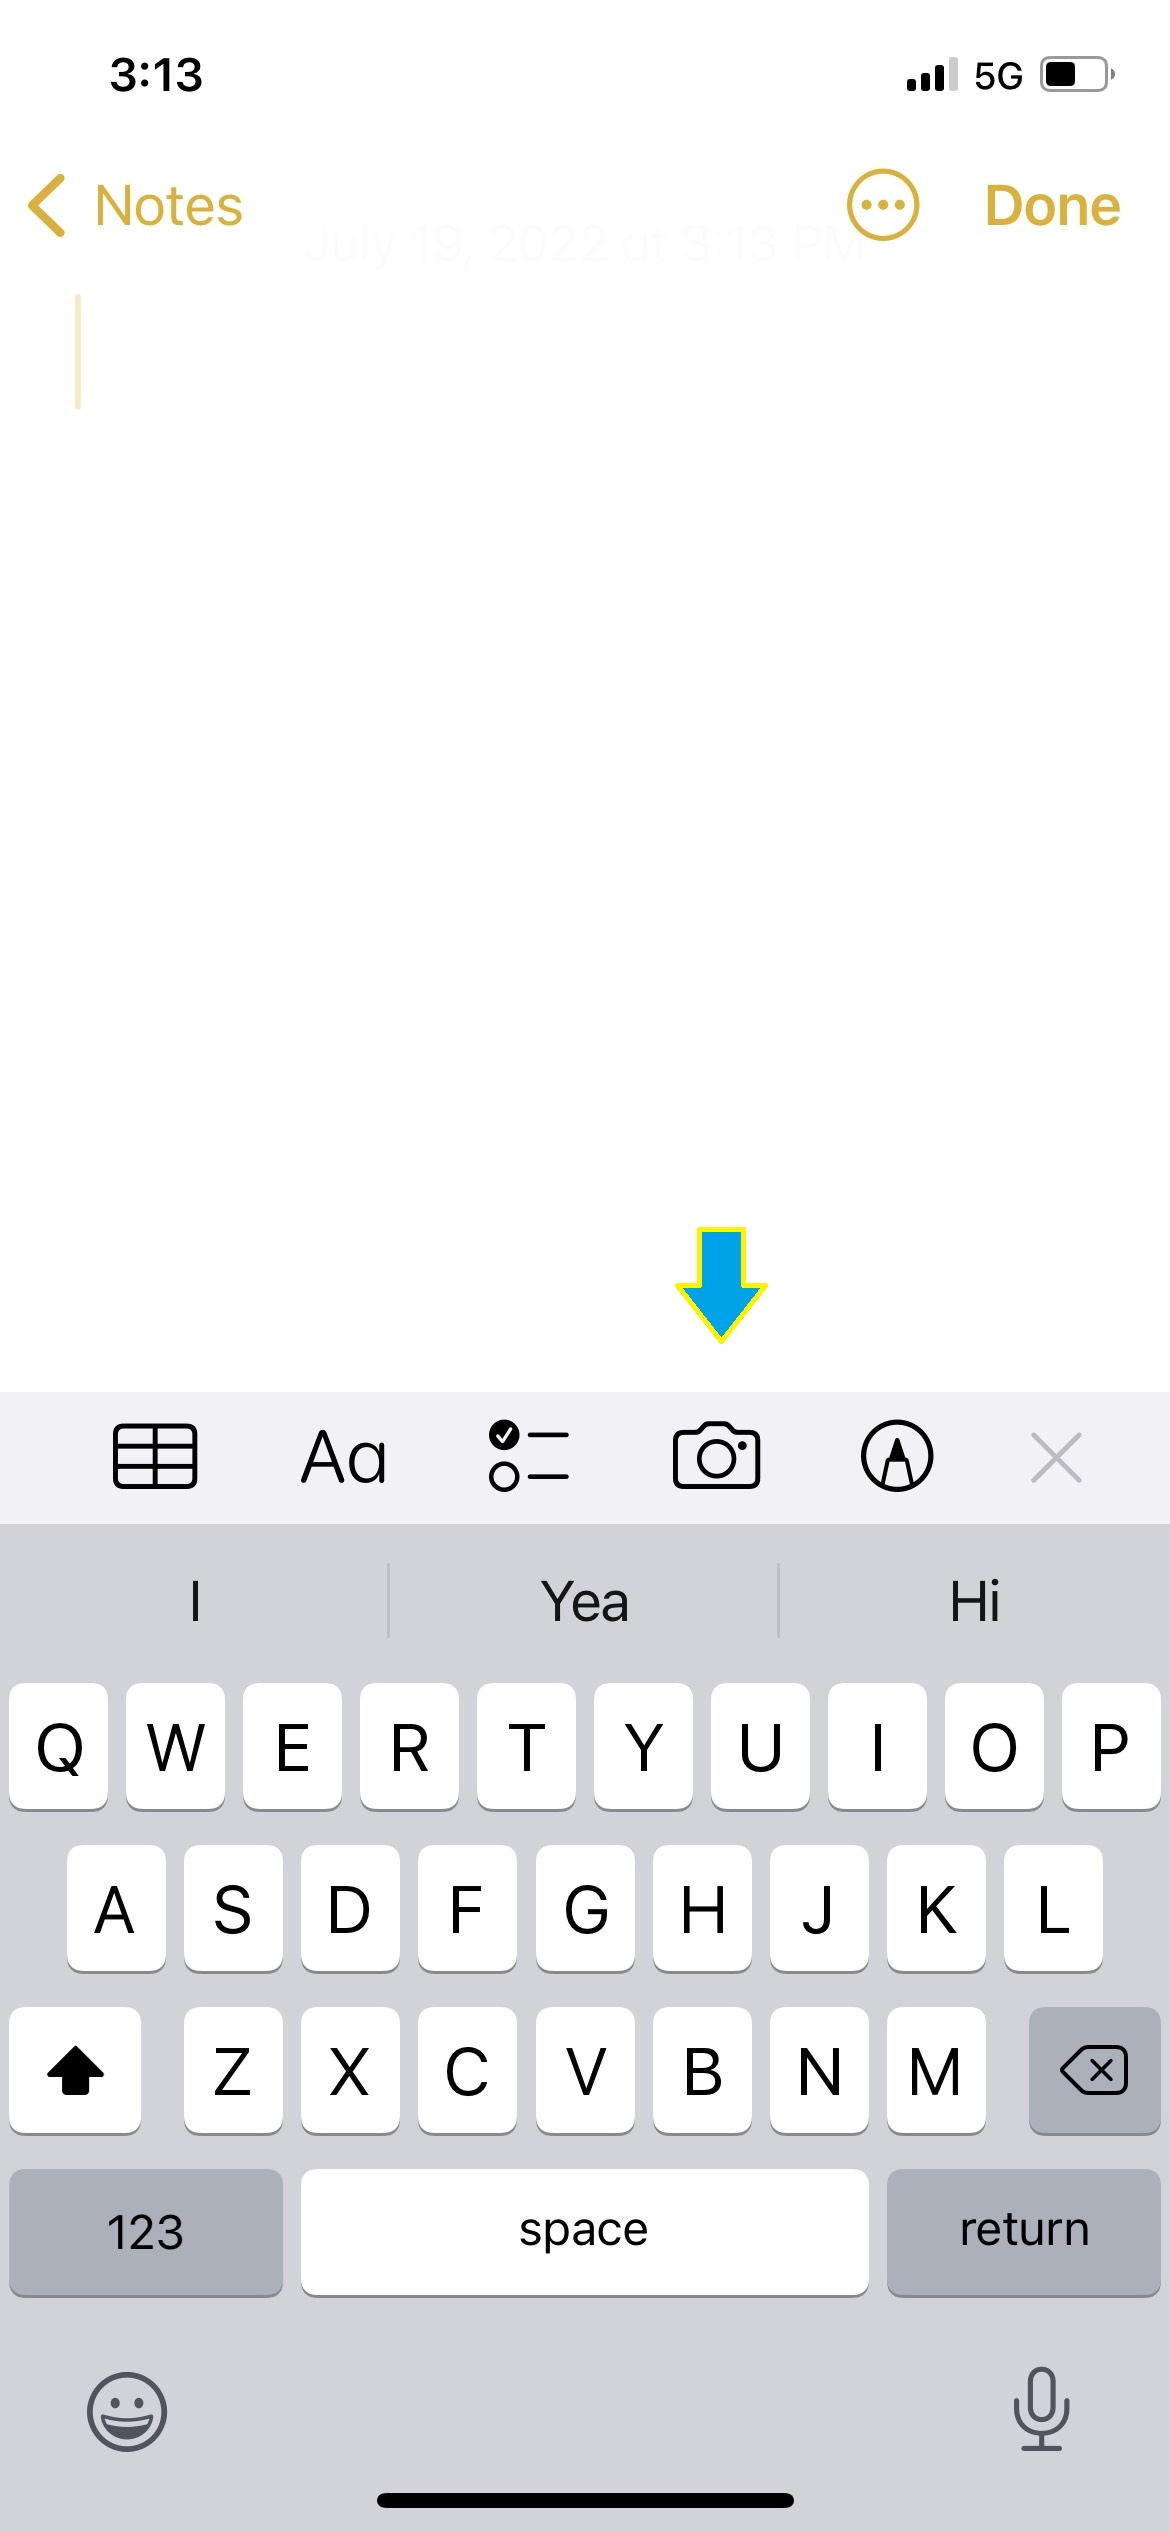
Step 2- Create a new note and tap on the camera icon.
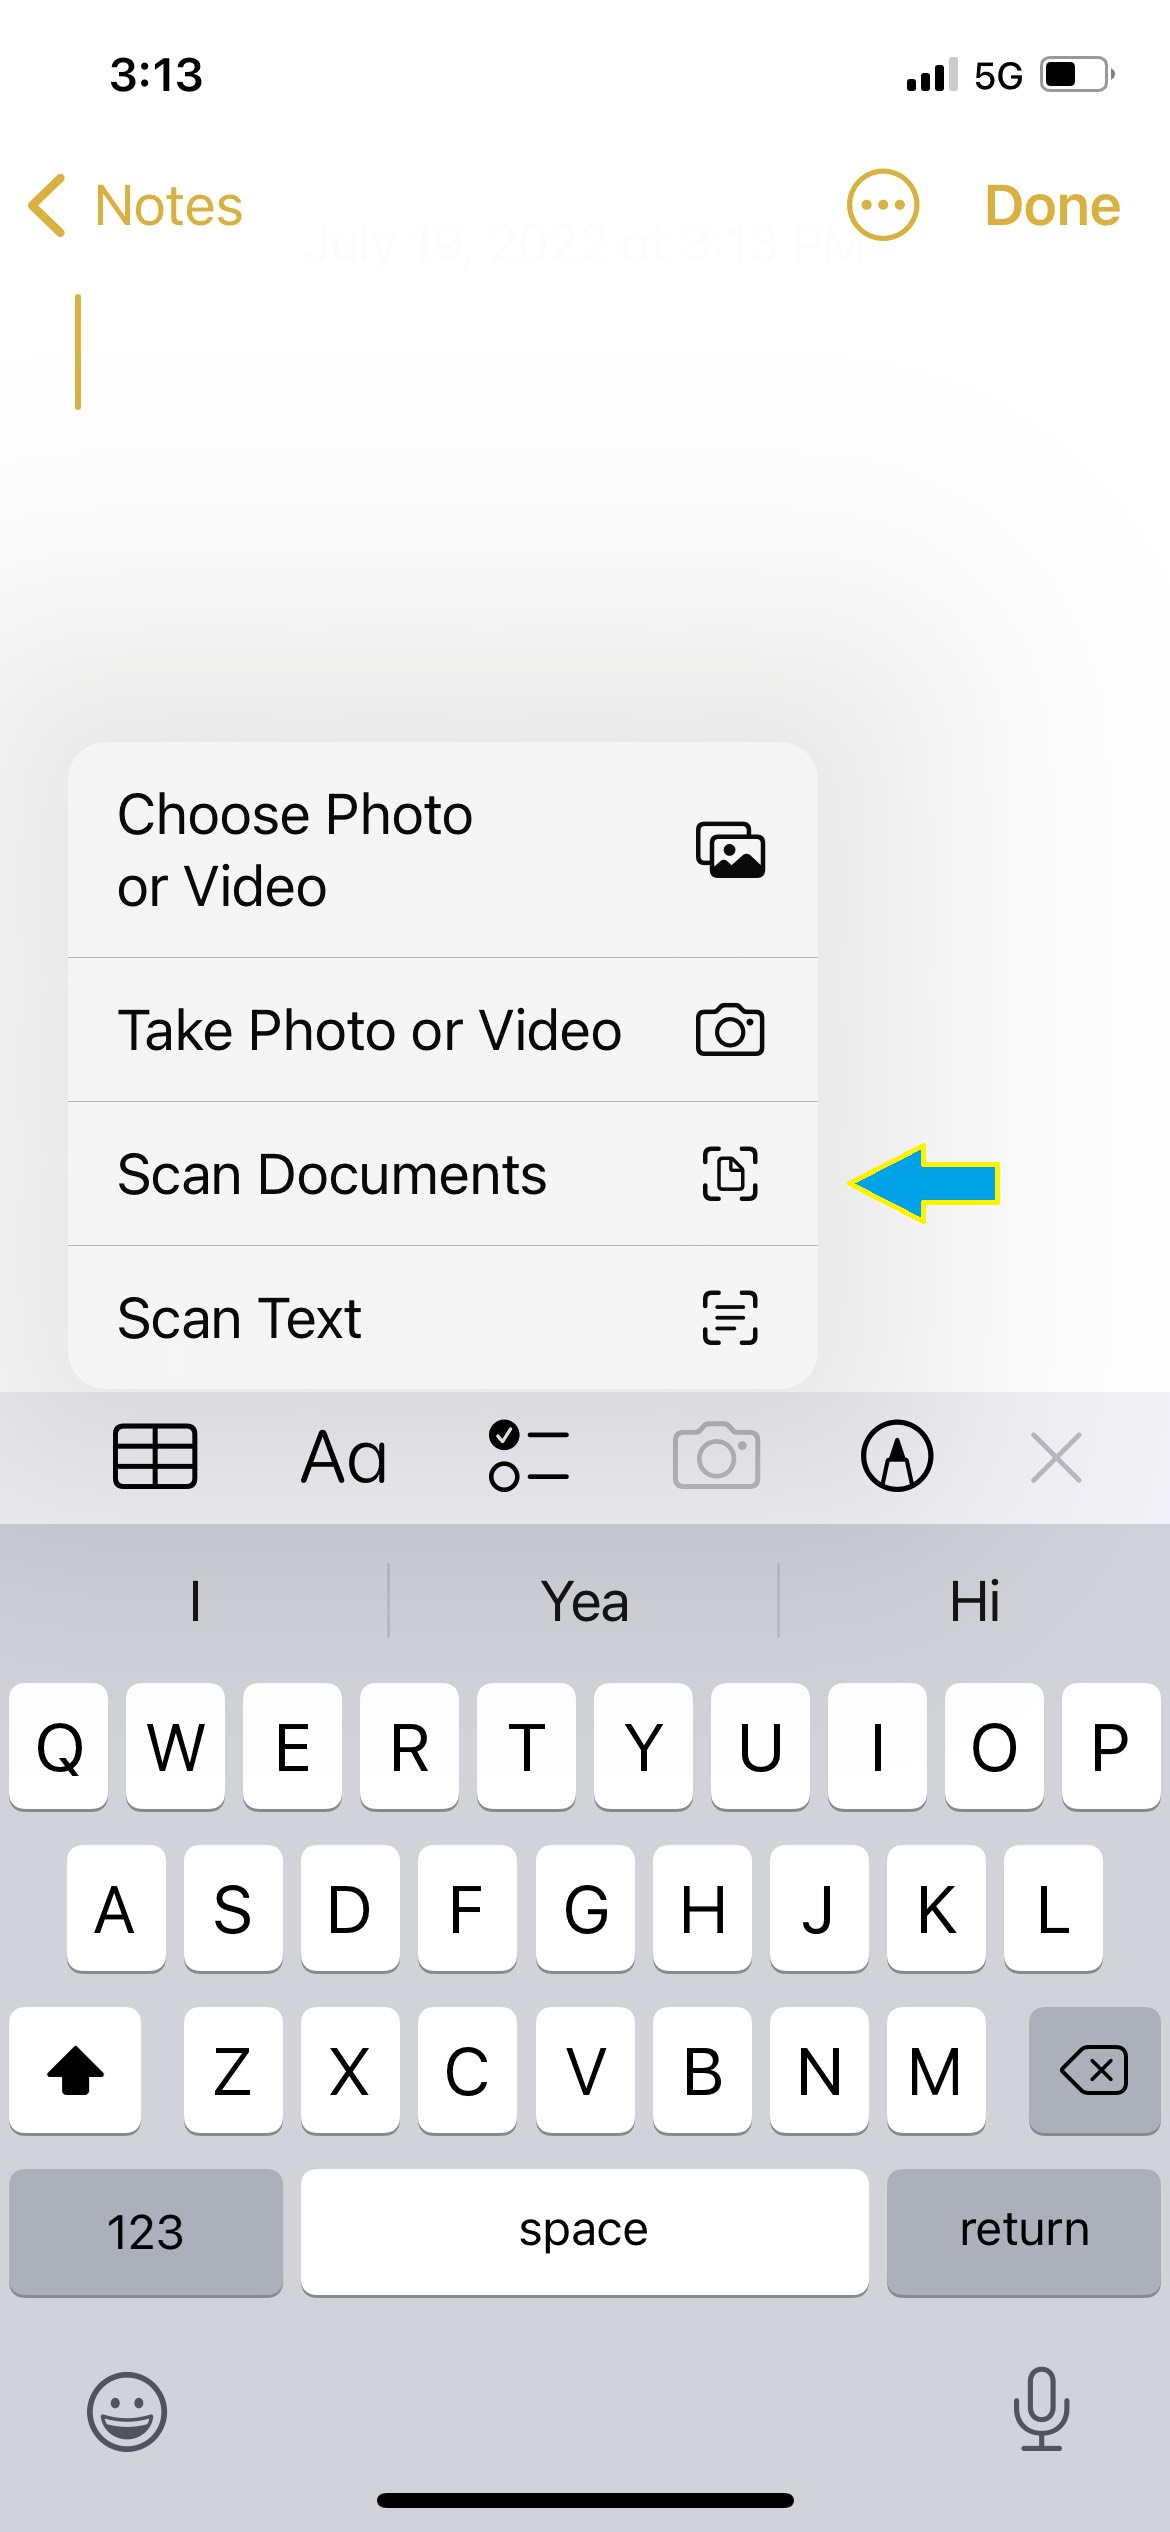
Step 3- Select the scan documents option.
Your camera will automatically open.
Step 4- Allow your camera to hover over your document (one page at a time).
Your document should be on a flat surface, in a well-lit area to capture a clear photo. Once your camera identifies the object, it will automatically snap a photo. If your scan is multiple pages, the camera will continue to take pictures one by one until you hit save on the bottom of the screen. You also have the ability to retake any photos that did not capture properly.
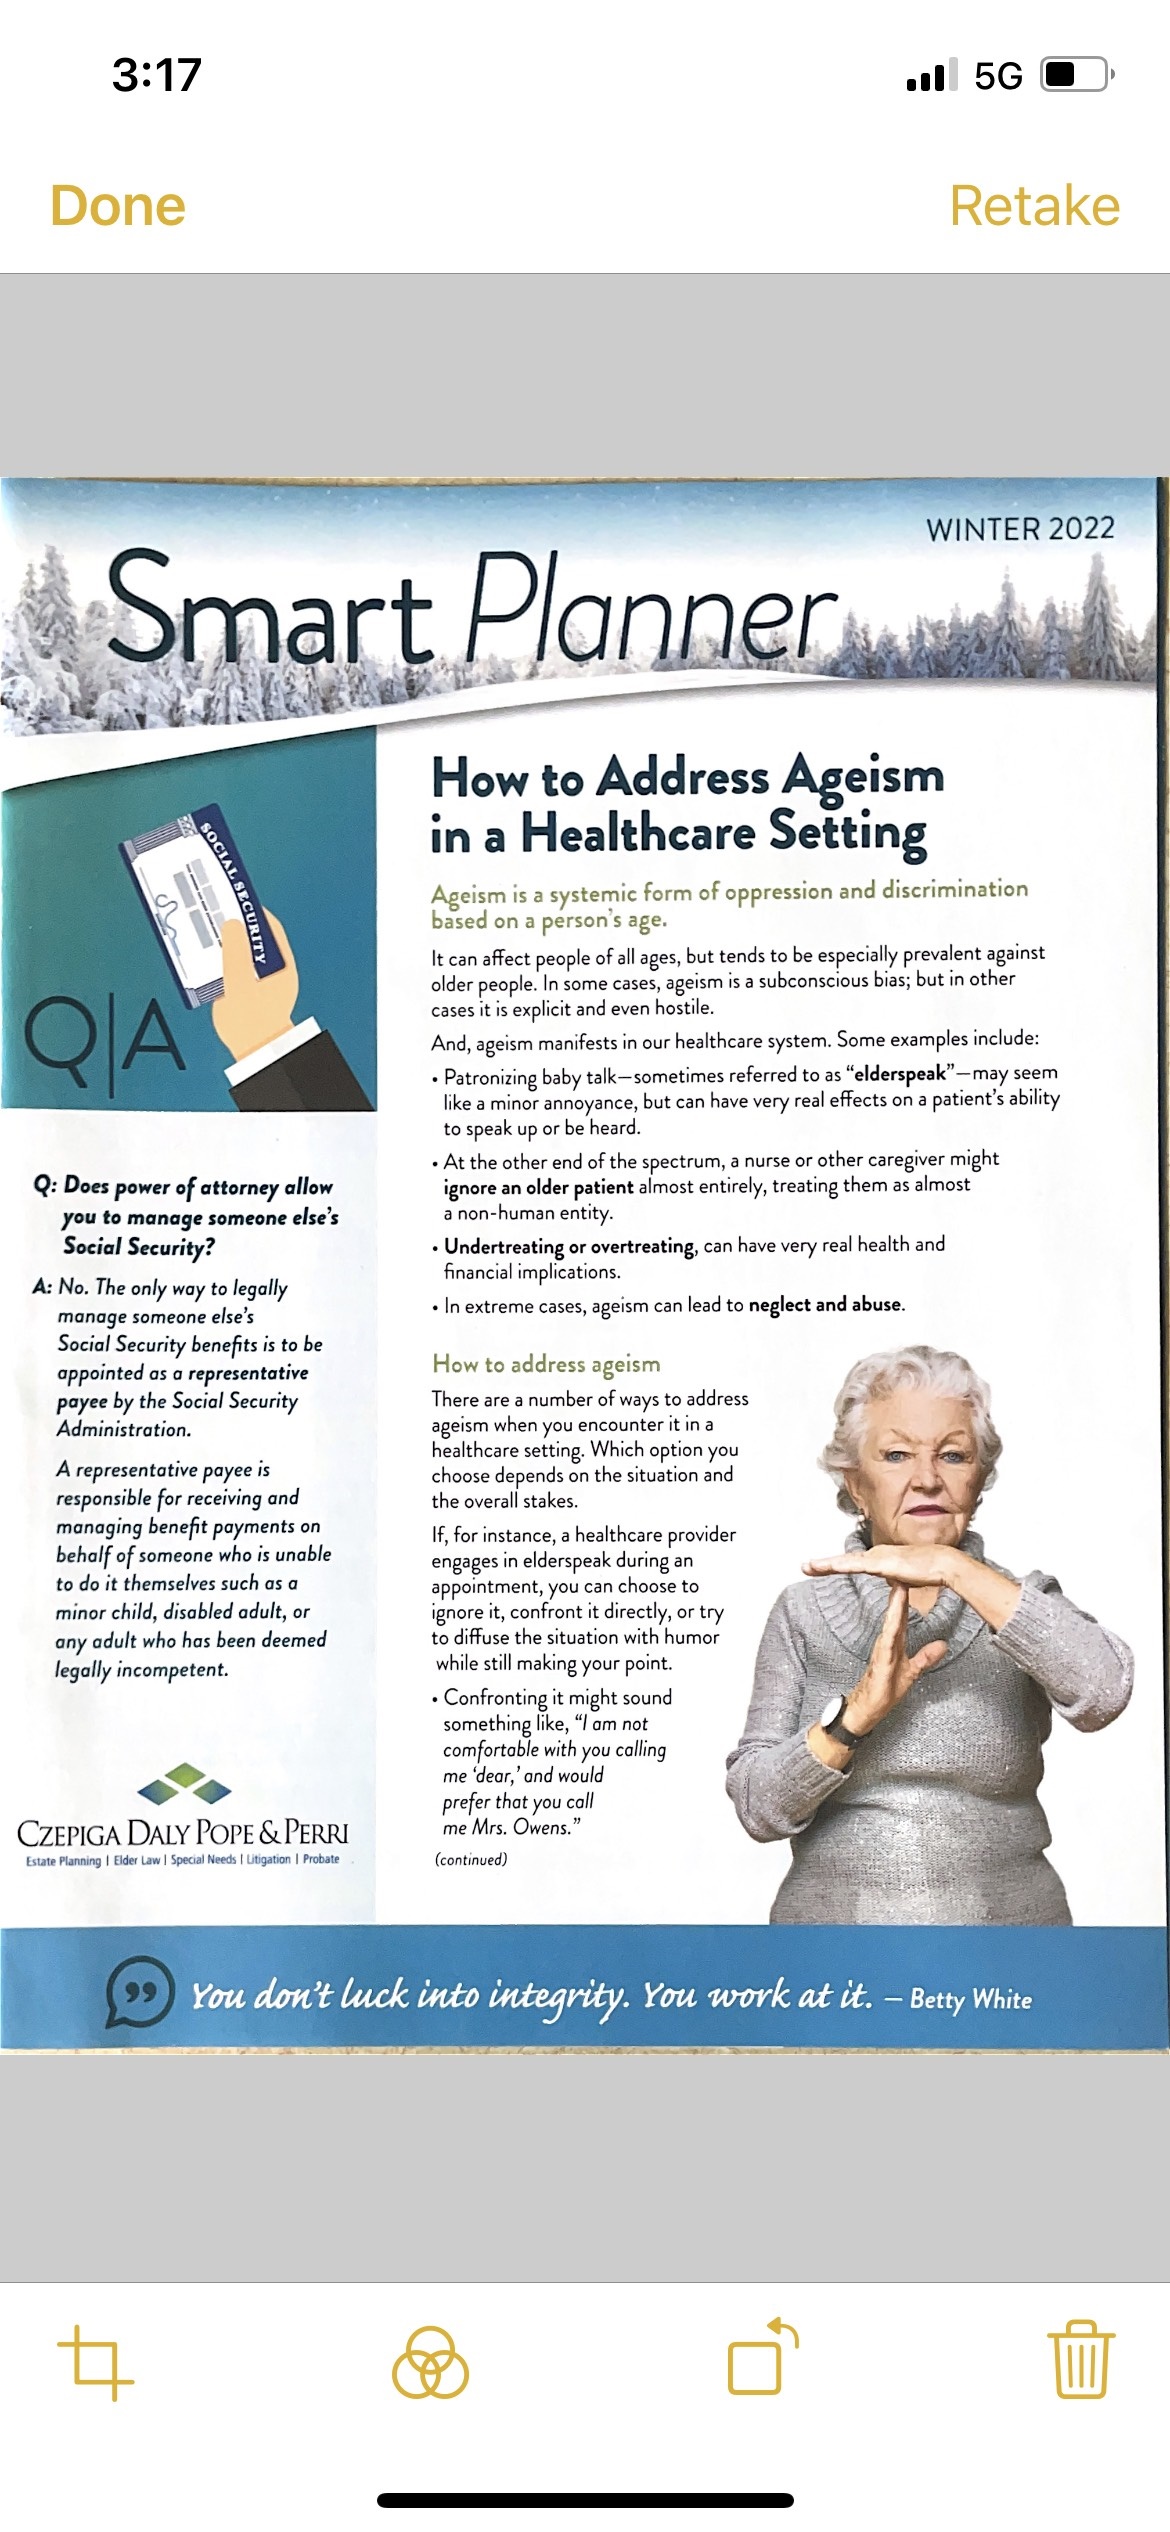
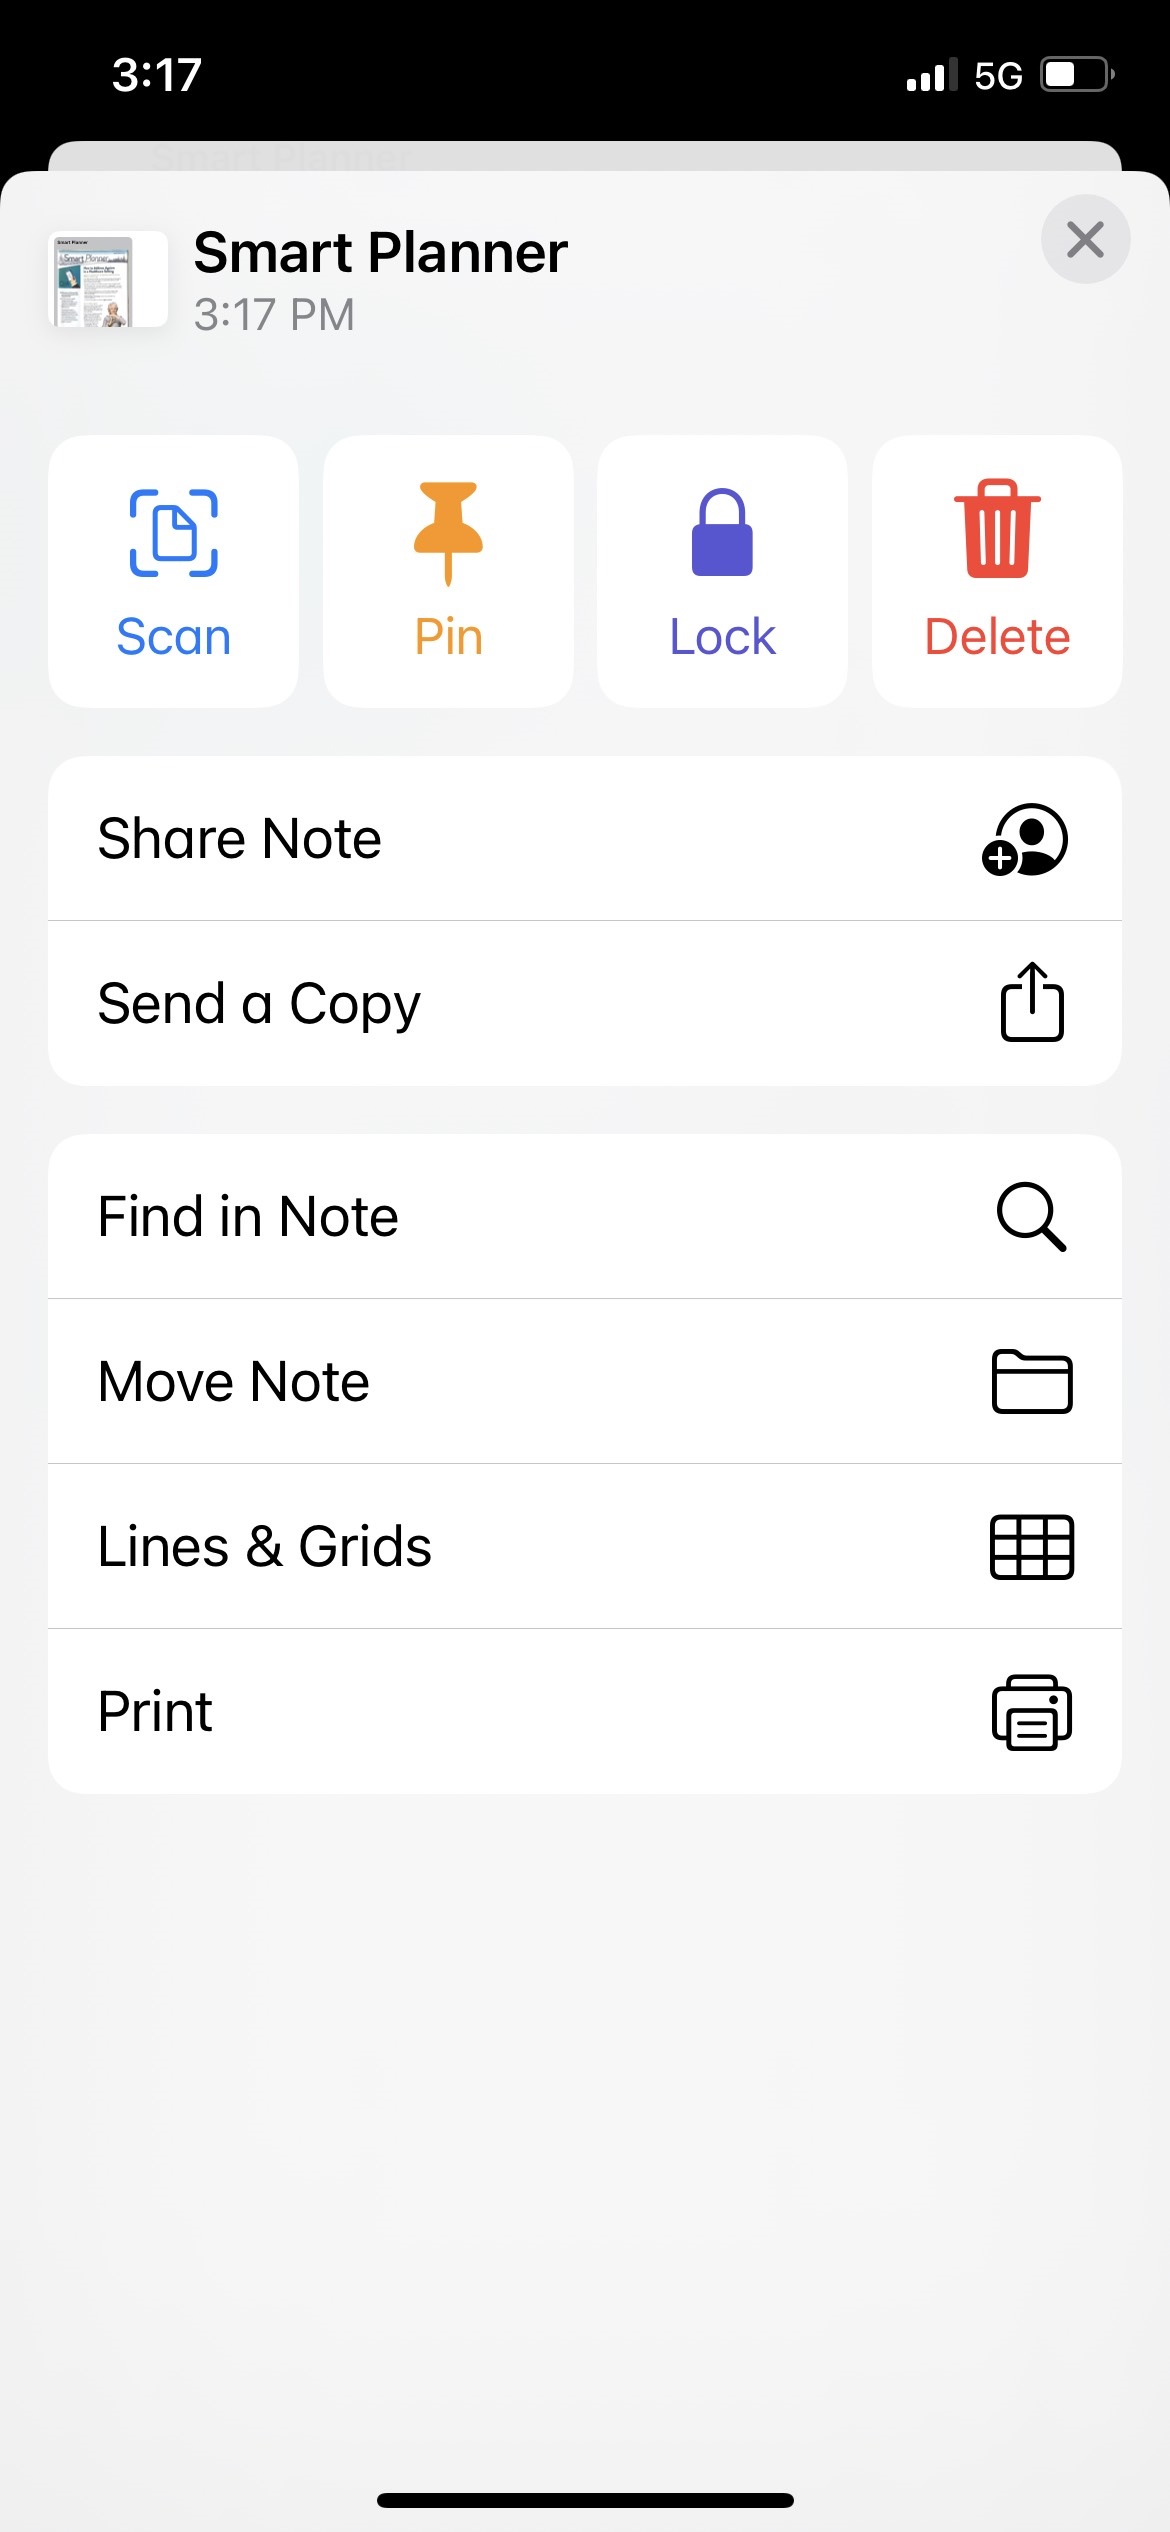
Step 5- Once the document is saved, you can still crop, change colors, rotate the landscape, and more.
When your document is complete and to your liking, you can share or save your scanned document.
I hope this helps you as much as its been a game changer for me!
Would I have known this feature existed if I had a paper manual from Apple? Yes, absolutely.
If I had one.
Related Posts:
Forgot Your Reading Glasses? Here is Your Backup Plan
Make Life Easier with Technology: 5 Tools to Look Forward To
